

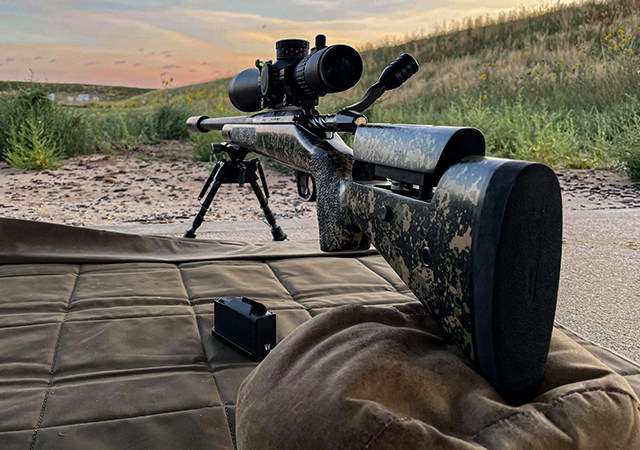
A trustworthy bipod is far more than just a kickstand to keep your rifle out of the mud; it is a critical precision shooting rest. The ideal bipod for punching paper on a manicured range will prioritise very different performance metrics than a lightweight bipod designed for a gruelling Scottish deer stalk.
Because the bipod is an integral part of your rifle system, you must be comfortable and confident behind it to shoot at your absolute best. While there is no single "best" bipod for every shooting scenario, certain designs, heights, mounting systems, and materials lend themselves flawlessly to specific disciplines.
In this comprehensive guide, we will explore the different bipod mounting systems, compare construction materials, highlight superlative options like the Magpul Sling Stud QD Bipod, and explain the critical marksmanship technique of "loading" your bipod for ultimate precision.
The Foundation: Bipod Mounting Systems Explained
Before selecting a bipod, you must determine how it will attach to your rifle’s forend. The modern shooting industry generally relies on four primary attachment methods:
1. The Picatinny Rail (MIL-STD-1913)
The ubiquitous Picatinny rail is a highly popular, rugged, and versatile mounting system. Characterised by its standardised cross-slots, it allows for incredibly secure and consistent accessory mounting.
- Best For: Tactical rifles, heavy precision setups, and shooters who want to use a Quick Detach (QD) lever to instantly remove their bipod.
- Consideration: Can add slight bulk and weight to the forend, and the machined edges can be sharp if gripped bare-handed.
2. The M-LOK® System
Developed by Magpul (an Edgar Brothers supported brand), M-LOK utilises machined negative-space slots on the firearm’s forend.
- Best For: Modern sporting rifles, lightweight hunting chassis, and streamlined ergonomics. Accessories bolt directly into the chassis, keeping the bipod incredibly close to the bore axis for enhanced stability and a lower centre of gravity.
- Consideration: Requires an Allen key to install, making it slightly slower to detach in the field compared to a QD Picatinny mount.
3. The ARCA-Swiss Rail
Rapidly becoming the gold standard in Precision Rifle Series (PRS) and high-end tactical competitions, the ARCA rail is a continuous dovetail rail running the length of the forend.
- Best For: Competitive shooters who need to slide their bipod forward or backward instantly to shoot off barricades or balance the rifle on uneven props.
4. The Traditional Sling Swivel Stud
Found on the vast majority of traditional wooden and synthetic hunting rifles, this is a simple metal stud protruding from the forend with a hole drilled through it.
- Best For: Traditional deer stalkers using classic Harris-style bipods. It is unobtrusive, lightweight, and requires zero tools to attach.
- Consideration: Under heavy magnum recoil, swivel stud bipods can sometimes twist or shoot loose, meaning you must routinely check the tension during a hunt.
Choosing the Correct Bipod Height
Selecting the correct leg length is just as vital as the mounting system. A bipod that is too short will force you to crane your neck, while one that is too tall will prevent you from establishing a solid cheek weld.
|
Bipod Height |
Ideal Shooting Position |
Best Application |
|
6" – 9" |
Prone & Benchrest |
Manicured target ranges, F-Class, flat surfaces. |
|
9" – 13" |
Prone (Field) |
Deer stalking, uneven ground, shooting over short heather or grass. |
|
13" – 27"+ |
Sitting & Kneeling |
Varminting, woodland ambush, shooting over deep crops or tall brush. |
Pro Tip: For the vast majority of UK stalkers and practical shooters, the 9-13 inch range offers the most versatility, providing enough clearance to shoot over undulating terrain while remaining low enough for a stable prone position.
Materials Matter: Aluminium vs Carbon Fibre vs Steel
The material construction of your bipod dictates its weight, rigidity, and durability in the field.
- Aircraft-Grade Aluminium: The industry standard. Hard-anodised aluminium offers a superlative strength-to-weight ratio. It is highly resistant to the elements and can withstand the rigours of heavy field abuse without warping.
- Carbon Fibre: The ultimate choice for the nomadic mountain hunter. Carbon fibre legs shave critical ounces off the total rifle weight while retaining immense rigidity. However, it can be more brittle than metal if subjected to a severe crushing impact.
- Steel/Heavy Alloy: Reserved almost exclusively for F-Class and Extreme Long Range (ELR) shooting. These ultra-heavy bipods act as anchors, drastically reducing felt recoil and muzzle jump, but are entirely impractical for a hunting rifle.
Fixed vs Pan & Tilt Bipods for Uneven Terrain
Fixed Bipods: The Range Standard
Fixed precision shooting rests do not articulate. They are exceptionally rigid, making them best suited for flat, level concrete firing points. They create a highly repeatable platform, but if you take them into the field where the ground is sloped, your crosshairs will be permanently canted, throwing your bullet laterally off-target.
Pan & Tilt Bipods: The Field Advantage
Hunting-focused bipods typically feature a locking ball-joint or a tensioned pivot mechanism that allows the rifle to "tilt" (cant left and right) and "pan" (traverse horizontally).
- Why Tilt Matters: Out in the field, the ground is rarely level. A tilting bipod allows you to instantly level your scope's reticle to gravity, perfectly cancelling out the uneven terrain.
- Why Pan Matters: The panning feature allows you to track a moving deer or transition between multiple targets without having to lift and reposition the bipod's feet.
Our Top Pick: The Magpul MOE Bipod
Magpul manufactures a fleet of superlative accessories, and their primary bipod, the MOE Bipod is a true "Jack-of-all-trades" precision rest that bridges the gap between field and range.
Constructed from a highly durable blend of Mil-Spec hard-anodised aluminium and injection-moulded polymer, it offers incredible strength at a fraction of the weight (and cost) of dedicated steel target bipods.
- Advanced Articulation: It boasts spring-loaded, locking legs with an impressive 50 degrees of total tilt and 40 degrees of pan, all controlled by a single, knurled locking knob located between the legs.
- Streamlined Versatility: Designed with a remarkably low-profile footprint, it prevents snagging on underbrush. It is available in multiple configurations to seamlessly mate with M-LOK®, Picatinny, or Sling Swivel Stud forends.
Marksmanship Masterclass: How to "Load" Your Bipod
Simply resting your rifle on a bipod is not enough. To achieve maximum accuracy, manage recoil, and spot your own bullet splash, you must learn the fundamental marksmanship technique of "loading" the bipod.
Loading your bipod is the process of actively leaning your body weight forward into the rifle, anchoring the bipod feet into the ground. This takes the mechanical slack out of the bipod's legs and mitigates the rifle's capacity to jump backwards and upwards during recoil (often called "bipod hop").
1.Establish Your Position:
Lie directly behind the rifle, ensuring your spine is perfectly aligned with the bore axis. If your body is angled to the side, recoil will push the rifle laterally off target.
2.Plant the Feet Firmly:
Ensure the bipod feet are dug into the ground. If shooting on a slick surface (like a concrete bench), you may need rubberised feet or a shooting mat with a pre-load webbing strap to prevent sliding.
3.Apply Forward Pressure:
Without using your hands to push the rifle, shift your torso slightly forward. Dig the butt pad firmly into your shoulder pocket, pushing the entire rifle forward until you feel the bipod legs tense and flex slightly against the ground.
4.Maintain Tension Through the Shot:
Hold this forward pressure as you execute your breathing cycle and trigger press. When the rifle fires, the pre-loaded tension will drive the muzzle straight back down to the target, allowing you to instantly see your bullet impact through the optic.
Conclusion
Choosing the right bipod requires careful and considered assessment of your primary shooting discipline. In an ideal world, a shooter would own a heavy, rigid steel bipod for dedicated range shooting and a lightweight, articulating carbon fibre bipod for hill stalking.
Fortunately, modern engineering provides exceptional crossover options. By selecting a versatile, pan-and-tilt capable model like the Magpul Bipod, choosing the correct height for your environment, and mastering the fundamentals of loading your bipod, you can create a highly accurate shooting platform whether you are on a pristine firing line or deep in the Scottish heather.
FAQs
"Tilt" (or cant) allows you to rotate the rifle left and right on its axis to level your crosshairs on sloped or uneven ground. "Pan" allows you to traverse the muzzle horizontally left and right to track moving targets without physically picking up and moving the bipod's feet.
"Bipod hop" occurs when the rifle recoils on a hard surface and the shooter has not properly "loaded" the bipod. If you do not apply forward body pressure into the rifle before breaking the shot, the recoil energy has nowhere to go, forcing the bipod to bounce violently upwards.
Not directly. You would need to purchase an M-LOK to Picatinny adapter plate. However, most premium manufacturers, including Magpul, offer their bipods with dedicated Picatinny or M-LOK mounting heads to ensure a direct, low-profile fit without the need for adapters.